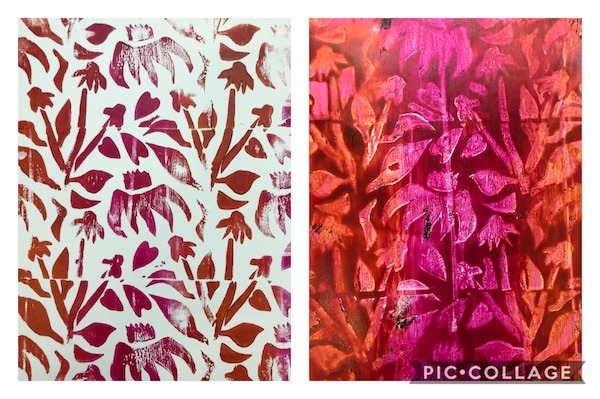
Positive and negative prints from repeating stamps
This week’s lesson from the gelli printing class* is about how to create a repeating (or tiling) pattern. The design connects on the sides so that the pattern repeats, but it’s not obvious where the seams are. The process is to start the design in the center of a square, then cut it into 4 pieces, reassemble it, and fill in the remaining space. It’s a common method for creating designs for fabric or wallpaper. Julie describes it in detail in her course and shows how to use the stamps with gelatin plate printing. My stamps are 4” square and made of craft foam and cardboard. I used my favorite coneflower shapes to create the design.
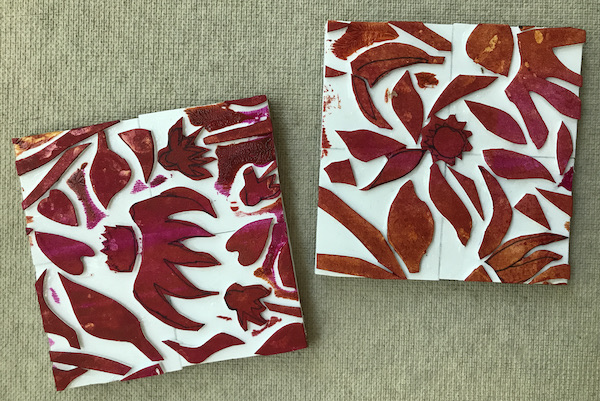
Repeating foam stamps, 4×4″
To use the stamps, I roll paint on the gelli plate, apply the stamp to remove paint, then stamp it on a piece of paper. I repeat the process until the plate is covered with the design, then pull the print. This process creates a positive and negative print at the same time.
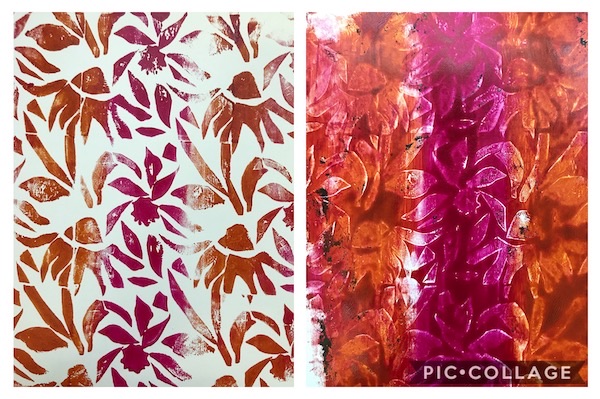
Positive and negative prints from repeating stamps
*Note: The lessons are from A Year of Gelatin Printing taught by Julie Fei-Fan Balzer. I’m not connected with her except to tell you how much I’m learning and enjoying the class.
To see more of what’s going on in the class, follow Julie @balzerdesigns on Instagram or search for hashtags #whatjulietaught and #ayearofgelatinprinting.
One Comment
Did you go downtown to our museum of art to see the Escher exhibit? Escher’s wood block prints are amazing. Your prints are beautiful.